Monday, August 5, 2013

Tie and Dye Projects

Tie-dye is a process of tying and dyeing a piece of fabric or cloth which is made from knit or woven fabric, usually cotton; typically using bright colors. It is a modern version of traditional dyeing methods used in many cultures throughout the world. Tie-dyeing is accomplished by folding the material into a pattern, and binding it with string or rubber bands. Dye is then applied to only parts of the material. The ties prevent the entire material from being dyed. Designs are formed by applying different colors of dyes to different sections of the wet fabric.

Tie and Dye Sundress
Tie and Dye Infinity Scarf


Tie and Dye Tablet cover

 
Tie and Dye Basket Cover


MATERIAL
Plain fabric 
Dye
Salt
Water

METHOD
Get a piece of fabric , coloured dye,  and 1 cup of salt. Set-up at a place with a water supply nearby (sink area).
Tie knots to the fabric in regular interval.


Soak the fabric in the dye (and salt) and boiling water mixture as instructed on pack.

Rinse well in clean water. The water from the squeezed fabric should run clear after. Wring the fabric

Hang Outside to dry.

Tips
Wear unwanted clothes as you may stain them with dye!

Wait at least 72 hours before washing this as the colours might seep into other fabrics/garments.

Wednesday, May 15, 2013

How to use Fabric Paint

Few colors and a suitable brush, fabric painting opens up endless opportunities for transforming your wardrobe and your home. It enables you to create one-of-a-kind pieces of wearable art (t-shirts are the most common) or to design some special cushion covers, curtains,scarfs or tote bags.
Techniqes of fabric painting includes Stenciling,  Block printingand Free hand Painting. 

Lets start with fabric stenciling


FABRIC STENCILING


Chiffon Hand painted scarf with rhinestones


These trendy stencils are great for stenciling your own designer pillows or curtains or transforming garage sale furniture finds into cool decorative pieces. Decorative possibilities are endless with these versatile reusable stencils!


 Fabric Stenciling Basics: 

Best fabric for painting on is 100 per cent cotton with a tight weave  But good results can be obtained with rayons and silks too. The best is to try a sample square to check the results.
Natural sponges are excellent tools for controlling the amount of pigment applied. Dab the paint-filled sponges lightly with vertical pressure.There are many paints designed specifically or painting on fabric. Regular craft acrylics can be turned into suitable fabric painting mediums with the simple addition of Textile Medium. Heavier fabrics will not move much as you stencil, but lighter fabrics can be held in place for stenciling by working on a smooth cardboard surface that has been lightly sprayed with stencil adhesiveUsing stencil adhesive to maintain your stencil in position is also very helpful.If washing the item in the future, the easiest way to heat-set your stenciled fabric is to place the item in the dryer on high heat for an hour. Otherwise, you can heat set the painted area with a hot, dry iron and pressing cloth for a minute or two. A stippling or pouncing technique can be used with the stencil brush to work the paint well into the fibers.

Basic fabric -printing supplies

Self Healing Mat- Place the mat under the fabric
Template/Stencil
Fabric Paint-
Natural Soft Sponge
Foam Paintbrush / Rollers
Paint Palette


Method

 Cover a work surface with kraft paper and tape the fabric on top. Prewash the fabric. Lay the stencil on the area of the fabric you wish to embellish. If you wish to mix colors to create a custom shade,do so on the palette. With a clean sponge,dab the paintinsidethe stencil. In general, its best to work left to right top to bottom. Let dry about 3 minute. Once you finish stenciling, set paint with an iron.

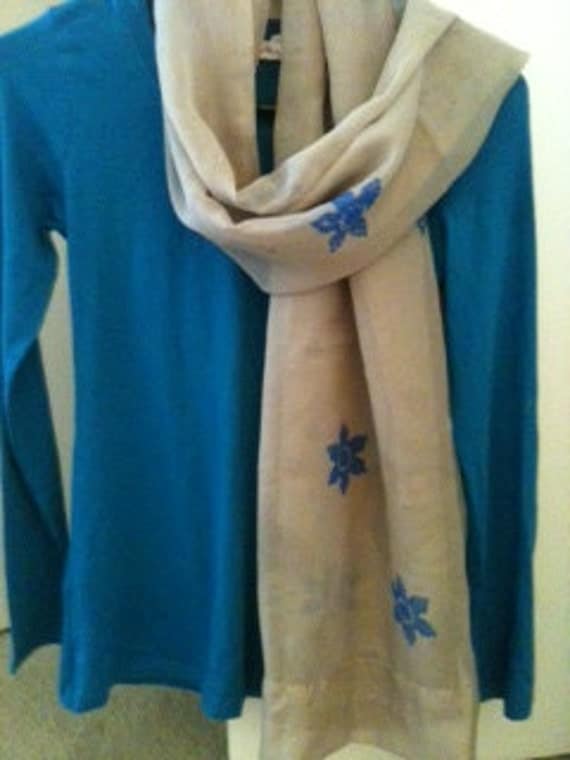
Fabric Free hand painting


A super cool and interesting idea to get all your fabrics trendy and stylish is to paint it yourself and personalize it. Check out some awesome techniques and designs you can go for.

Preparing Fabrics for Painting Designs
There are points you need to take care of before you start painting designs on fabrics. It includes:
1. It’s better to choose 100% cotton fabric for beginners to start painting.
2. Pre-wash fabric you want to paint, so that all the starch is removed from the piece of cloth and it does not shrink after you paint and wash it.
3. Finally, iron your fabric to make it wrinkle-free so that it doesn’t havoc designs.
Important Tip:
To check if the fabric is ready to be painted, pour a drop of water on cloth….if the water droplet is absorbed that means it is ready to be painted directly. If the water drop beads up, it means you need to wash your piece of cloth.
And now you are ready to paint! Let’s get started…
How to Start Painting on Fabric
Since now your fabric is ready to be painted, you can either apply fabric paints directly and make free-hand designs or follow the following steps;
1. Choose a pattern or design you want to imprint on your fabric and draw it on a sheet of paper.
2. Lay a carbon paper on your selected piece of cloth where you want to paint . Now, imprint the design you have already made on paper by outlining it.
3. Use wooden embroidery hoops (easily available in the market) to the area you want to paint on.
4. Use fabric paints directly using round paint brush (for beginners) and start painting your fabric in flow with the design and let it dry.

Tip: If you are artistic enough and want to go or free hand painting, make sure the you lay a newspaper right below the area you want to paint so that the colors don’t get down on the second layer of cloth.


Monday, May 13, 2013

Rocking Chair Cover


Rocking chairs plays an important role in your life if you have a baby. Aanya loved to go to sleep in this rocking chair even before she was born. My chair cushion cover faded over the years and even some threads were pulled out, So I thought of giving this chair a make over. This is a day project and is very easy to make a rocking chair pad cover.
Before
After


The Material
Silk Fabric
Matching thread
14inch Zipper


The Stiching:


Take the chair pad and place it on the Chosen fabric. Before placing the pad fold the fabric into half. Cut the fabric leaving 2 inch margin on all sides.


After cutting match the  back and front of the fabric placing the wrong side outside and stich along the three sides.


Now take the chair pads and put them into the basic cover with wrong side up. Now make two curved pleates from bottom to top and pin it. Adjust the pleats such a way that the pillow cover fits tight.


Repeat the same procedure for the bottom pillow.


Stich the zipper for both the back and bottom pillows.


Bridesmaid Clutch Bag

The idea of the clutch originated with the "Reticule" hundred years ago, during the Victorian era. It was then a mid-sized bag, made out of Lucite, Bakelite, silk, satin or brocade.  Originally popular in France, they crossed over into Britain, where they became known as "indispensables." 
Proper ladies used the "Reticule" to store their handkerchiefs during elegant evenings out on the town. This fashion then went out of style, but came back during World War II.  From the after-war to our era, the clutch purse is the evening bag of choice for women everywhere.


This zippered clutch is ideal for any occasion, morning ,evening,formal and informal parties. The outer fabric is silk with rhinestones border and scattered rhinestones all over the front. The inner fabric and sides aremade of soft white fleece. 

Dimensions
length-5 inches, width- 11 inches, depth- 4 inches
Its an perfect Bridesmaid, Mothers day, Anniversery or Birthday gift. 


Materials
Silk Fabric- 1/2 yard
Fleece fabric for lining - 1/2 yard
Quilting batting- 1/2 yard
Cardboard strip- 11 inches length 2 inches width
White zipper- 7 inch
Rhinestones- 

Stiching:
Step 1
First of all cut a hexagon from the silk fabric, in the dimensions of length 13 inches and width 13 inches
Cut two hexagons from the batting and fleece of dimension- length 11 inches and width 11 inches
Cut two cup shaped fleece fabric for the sides.
Place the fleece cut out place the cardbord in the middle of the fleece hexagon.
Then place the batting and then the silk layer, put a cotton cloth on top.
Heat the iron and apply the hot iron on the layers first the silk side then turn it, put the cotton cloth on fleece cutout and apply the hot iron two to three stroke.
Now your base for the bag is ready.


Step 2
Stich the silk fabric around the fleece by making two folds.
Stich along both the sides of the cardboard to hold it firmly with the fabric.
Now take the sides.


Again double fold and stich the sides of both the pieces individually.
place it alligning with the cardboard and stich with the sides of the bag.


Do the same thing for the other side.
Once your sides are done take the zipper and pin along the fleece fabric at the top.
Stich it carefully.


Step 3
In this step you need to apply the rhinestones. 
There are two ways to do that one is to apply it manually sticking each rhinestone with fabric glue which is tiresome and messy.
The second option is to use a bedazzeler or hot glue gun.
I used the second option.

Friday, March 22, 2013

Miniature Fleece Purse

These adorable, easy- to- assemble bags are just the right size for holding a few small necessities- basic make-up supplies, cell phone, money bags, keys and MP3 players. The bag is great for toddlers (they can put thier crayons and drawing supplies) to teen girls. Try to make these purses with fabric scrapes and enoy yourself or gift the beautiful purse that fashionistas crave for.


The Material:
2 pieces of red fleece(can also use felt if preferred) 5by 7 inches (12.5 cm x 18cm)
1 yard pink yarn
Green yarn sufficient for embroidery
White button
1 piece pink fleece
1 long red zipper
Small strip of velcro


The Stiching:


Cut out the fleece in oval shape.

To customize the purses with original drawing, use a dissapearing -ink fabric pen to sketch shapes onto the fleece scrapes.


 After cutting the bird in pink fleece Place it in the middle of the red felt cut out. Pin the bird to the bag cut out and make a fern stich by hand.


To make the fern stich keep the knotted part outside to make a stem for the leaf. 


Next border the bird with simple stich and stich a button on the eye area and iron on the batting on the wrong side to save your threads from pulling in the future.


Take the second red fleece cut out and make a back pocket by placing your phone and cutting out a square piece inch bigger on all sides. Stich the velcro.

Now place both the red fleece cut outs carefully. Check whether they are alligning properly with each other and pin it to sew. Try to stich in one time so that it the stiches are in a line and not curvy. 
Take the pink yarn and tie a plate using three threads. 
Put it in the opening of the bag and adjust the zipper with it and sew the zipper.

Now with the invisible pen mark small traingles and cut neatly. You can avoid this step by initially cutting the felt cut outs with pinking shears.


Garden Diaper Stacker

I love daiper stacker, they are a cute addition to the nursery and help organise your daiper but at the same time are very handy to use.I had a garden theme for my nursery. I was looking for a similar daiper stacker but did not like any of them so decieded to do it myself. This handy diaper stacker conveniently holds 3 dozen diapers and can be hung off the changing table or anywhere you like.  It offers quick and easy access through the front slit opening. My baby is a girl so I have made it very girly with pink ruffles and flowers and butterflies.


         ggf 

The Material:
1 yard dark pink  fabric for lower body
Quater fabric for  fusible interfacing piping and appliques
Half yard fabric light pink for semicircle body and ruffles
Child’s size hanger
10" x 14" piece of cardboard

The Cut Outs:


2 of piece #1 for bag walls at (see diagram)
1 of piece #2 for bottom at 10 ½" x 14 ¾" (no diagram)
1 of piece #3 for (bottom) cover at 10 ¼" x 14 ½" (no diagram)
2 of piece #4 for top portion from fabric (see diagram )
2 of piece #4 from Fusible Interfacing

The Stiching: (all seams are 5/8")

First draw the applique design on the top cut out. Thencut out the fabric and border the applique


Fuse interfacing to wrong side of each top piece (4).
On outside, pin piping (or lace) to wrong edge of one top section, having tubular portion just Outside the 5/8" seam allowance. Attach piping to curved edge only-not on the straight edge. Baste.
A zipper foot on machine works well to stitch piping in place. Pin top sections, right sides together. Stitch, leaving a ¾" opening at center top for hanger to go through.

Pin piping or lace to lower edge of top, allowing 1" extra for joining.
To join ends, remove 1" of stitching from one end and cut exposed cord the same amount. Fold fabric covering under ½" and place cord ends so they just meet. Refold fabric over cord. Baste in place along seam line.
Stitch center seam in BAG (1).
Turn under 1 1/2" on front edges of bag. Press under ¼" on raw edge and stitch in place. Machine stitch 5/8" from lower edge of bag. Clip seam allowance to stitching at each square.
To gather upper edge of bag, machine baste 5/8" and 1/2 " from raw edge breaking basting at seam.
Fuse interfacing to wrong side of BOTTOM (2).
Pin bottom to lower edge of bag, right sides together. Stitch. Press seam allowance toward bag.
Finish bottom between circles by pressing under 5/8" and stitching in place.
Take two a long strip of fabric you are using for the top and ruffle it and attach on either side of the opening.

Pin bag to top, right side together, matching notches, seam to center and having finished edges at center for front. Pull up bobbin threads and adjust gathers to fit. Baste and stitch.
Press under 5/8" on one short edge of each cover (3). Pin cover sections, right sidesTtogether.  Stitch. Cut corners off diagonally.
Turn right side out Press. Cut cardboard 10" x 14" (you may need to adjust by cutting more to make it fit). Slip cardboard into cover. Slipstitch opening edged together.
Insert covered cardboard into bottom of bag and child's hanger into top of bag. 


Friday, March 1, 2013

Baby Fleece Pants

I love to sew baby  pants they are easy and a day project but with a busy baby like mine it took me two days.
Baby fleece pants are a must in winters and I like to create them myself so that I can personalize it my way with different types of applique. This is a easy and fun project for begginers and sewing experts.


The Material: 

A pair of pants that currently fit your little one

half yard of fleece fabric

1 elastic

Iron on applique


The Stiching:
Lay down your current pair of baby pants on top of the folded in half fabric.
Cut around the pants, leaving about 1/2" extra around the sides, 1" on the bottom, and about 2" on the top. 
On the top, the side of the crotch keep two finger space cloth for the elastic to glide smoothly and not pull the fabric.


After cutting out the first leg (since the fabric is folded in half, you'll have two pieces), flip the pieces over and cut the other leg, the same size.  You should then have four pieces of fabric.
Note: if your little one wears cloth diapers, I recommend leaving an extra 1" on the inside near the crotch to add that extra girth for comfortable diaper wear!
Line up your pieces so that the right sides of the fabric are touching.
Pin along the crotch line of each leg.  You'll only sew from the top of the pant leg to the crotch point. 
Sew with the edge of the fabric on the edge of your machine foot.  This will give you a 1/4" seam.
Repeat for other leg.
Sew the side near the crocth area from the leg to the joint .

 SEW CROTCH
Line up your pieces so that the right sides of the fabric are touching.
Pin along the crotch line of each leg.  You'll only sew from the top of the pant leg to the crotch point.
Sew with the edge of the fabric on the edge of your machine foot.  This will give you a 1/4" seam.
Repeat for other leg.


 SEW ELASTIC
Once your basic pant is done. Now Take an elastic and pin in along the top. (I usually put the elastic and sew because this helps to understand where the elastic is and eliminates any mistake of stiching).
Feel the elastic and sew along the elastic line giving it enough room to move when pulled.
Here the extra fabric in the top portion will help the elastic to pull itself.


HEM BOTTOMS AND ADD APPLIQUE
Leave pants inside out.  Turn up the bottoms of each leg about 1/2", remembering to pin open seams like you did in the previous step.  If you want, you can use the current pair of baby pants to measure length here.  Align the crotches and match the hem length.
- Pin each leg the same length.
Sew along the wrong side of the fabric to hide the raw edge.


Once the pant is ready take your store brought applique.
Heat the iron and follow the instructions on your packet.


Sunday, January 20, 2013

2013 Oscar Nominations Costume Design Analysis


This year for best costume design five creative movies are nominated.  The most interesting part is that two of them are snow white movies, yet the costume in these movies are completely different and not at all identical. If Mirror Mirror had the most extravagant costumes, on the other hand Snow white and the huntsmen had practical costumes, then Lincoln had historic costumes  and  Anna Karenina had periodic costumes. It will be quite tough to see any of them loose since all the costumes were a feast for the eye. May the best Man/Woman win.

  • Anna KareninaJacqueline Durran 
    To depict the Russian upper crust, Durran created costumes  for the main characters like Anna, Kitty and Count Vronsky that convey high drama through bustled dresses, furry stoles, severe necklines, and many military uniforms .ANNA (KEIRA KNIGHTLEY)
    At a party on the night that leads to her submission to Count Vronsky, Anna wore red. Like many of the gowns in the film, this one was in fact made of two pieces. The bodice is cut short in the front, with a long bustle tail in the back that rests on the full skirt beneath.
    The sparkling trim that appears along the bodice is actually a separate piece from the 1950s, which Ms. Durran found at a vintage sale, and worked into the final outfit. 
    ANNA IN BLACK 

  • In the book poor Kitty, as a young debutante, doesn’t miss the significance of the black dress worn by Anna Karenina to a ball where both dance with Count Vronsky (Aaron Taylor-Johnson). Tolstoy described the dress in the most fantastic way. "At the ball held not long afterward, Vronsky dances the first dance with Kitty, who looks radiant. Anna appears, dressed not in lilac but in black, which Kitty immediately realizes is Anna’s best color. Kitty is puzzled by Anna’s refusal to respond when Vronsky bows to her. Kitty dances many waltzes with Vronsky but later finds Anna and Vronsky dancing together. Anna looks elated and triumphant. For the final mazurka, Kitty turns away her suitors, expecting Vronsky to ask her to dance. She is stunned to see that Vronsky has spurned her to dance the last dance with Anna".. It wasn’t really about the dress as much as it was about how the dress framed Anna.’s beauty.

  • While the full skirt shape reflects what a gown of the period might have looked like, Ms. Durran studied the 1950s designs of Balenciaga and Dior to create the bodice, making it seem slightly off kilter. To highlight a sense of extravagance, Anna wears Chanel jewelry throughout the film, recognizable by the camellia motif.  Also of note, the rest of the dance party in this scene was dressed in very light colors  so the black dress on Ms. Knightley functions visually, because Anna is standing out against this society.”KITTY(ALICIA VIKANDER)
     wears a symbolically white dress trimmed with pink rosettes. This dress made her look childlike, as a counterpoint to Anna’s sophistication. Kitty does have more of a costume arc in terms of the progression of the film, As she grows up, she goes from wearing sugary pink, baby blue and white to wearing champagne beige when she is married to Levin and movies into his house. color evolves to a much more sophisticated palette.
    Count Vronsky
    The military costumes are an approximation of Russian uniforms,  Count Vronsky appears throughout the film in a variety of minimalist  uniforms, in shades of gray, pale blue or white, including a very brief appearance of one with fancy gold trim on both shoulders.
    Karenin, as the cuckolded husband, mean
    while, gets a look of his own. Karenin (Jude Law), above, more often appears in severe-looking outfits, with stiff and strict lines that come to reflect his character’s personality, or perhaps constrain it. 

  • Les MisérablesPaco DelgadoLes Miserables costumes are all about historically accurate bicorn hats to the high-waisted button-front trousers and the revolutionary rosettes,  Remember that this movie is about the miseries and struggle of the characters ,hence there are no extravagant or rich costumes
    FANTINE (ANNE HATHAWAY)
    Fantine begins in soft pink and lavender but when she becomes a prostitute is moved to a deep crimson, mirroring the red prison costume of Valjean. Along with the other women at the factory who assemble rosaries, she wears gauntlets and a bonnet of rich blue, Fantine is scraping a living as a factory girl as she hides her daughter away. In terms of the fashions of the time, Dresses are still loose and flowing with high waistlines.

    Bear in mind that Fantine had no money to spare and would only have dressed simply, though even simple dresses of the time look fussy to modern eyes. 
    JAVERT (RUSSELL CROWE)Inspector Javert is first encountered as a prison guard, and remains in law enforcement throughout his career. He is smartly dressed in a uniform coat with a double row of metal buttons, and in the earlier days of his career also wears a hat in the distinctive style worn by officials of the post-Revolution era.
    Initially, as a prison guard he wears a turquoise blue uniform. There was use of more and more silver on his uniform, probably to portray what an important person he became at the end of his life."


    COSETTE (AMANDA SEYFRIED)
    amanda seyfried eddie redmayne les miserables vogue feature 01
     She started as a girl dressed in black because she was living in a convent and had this sort of saint kind of look, a proper girl at a convent school. The style of cossete is excellently described in the book  by Victor Hugo "And then she was no longer a boarding-school miss, with her plush bonnet, merino dress, thick shoes, and red hands; taste had come to her with beauty, and she was well dressed, with a species of simple, rich, and uneffected elegance. She wore a black brocade dress, a cloak of the same material, and a white crape bonnet; her white gloves displayed the elegance of her hand which was playing with the ivory handle of a parasol, and her satin boot revealed the smallness of her foot." Marius first glimpse of Cosette is at the market, where she is wearing a bonnet lined in pleated pink silk that has a halo effect. Later on, her white bedclothes are finely embroidered with lilacs, vines and other blossoms. It probably may  be an explosion of emotions coming from her in  romance.
  • LincolnJoanna Johnston

    MARY TODD (SALLY FIELD)
    The use of crinoline to balloon out dresses was at its historical peak in 1865, Lincolns wife was criticized for spending too much on clothing. She wasn’t a great looker, Mary Todd, but  the over-trussing of her, her adornments, clothes, headdresses, and bonnets, helped her look great in a way. SallyField was asked to gain quite a bit of weight forLincoln, as much to fill out her face as her waistline, so she would look more like the historic Mrs. Lincoln.

    A big challenge was to differentiate the men’s apparel within the narrow confines of style and fashion of the period. That was especially required in the crowded scenes in the House of Representatives where over 100 characters were crowded closely together debating whether to pass a constitutional amendment to abolish slavery. 
    LINCOLN (DANIEL_DAY_LEWIS)Day-Lewis’outfits were more than just unstructured. His clothes were also designed to be a bit loose fitting, mirroring Lincoln’s gangly appearance . The costume designer excelled in recreating Lincoln’s iconic silhouette. Another masterful touch was the shawl she made for the actor. Day-Lewis wrapped himself in it in so many ways, using it to reflect his moods and thoughts, depending on the way he wore it. It was absolutely brilliantThe hat is also an integral part of Lincoln's costumes . In a Vanity Fair article the designer said that she even requested an approximation of the original hat’s Moroccan-red leather lining. She say's“He tucked a lot of his paperwork in there, which you see in the film”m
  • Eiko Ishioka


    Tony nominee (M. Butterfly) and Oscar winner (Bram Stoker’s Dracula). She led the creation of more than 400 costumes for Mirror Mirror.  The spectacular handmade gowns that Snow White and the Evil Queen wear required as much as 35 yards of fabric. The Evil Queen’s massive wedding gown weighs more than 60 pounds and caused Julia Roberts to pull a thigh muscle when turning too quickly in it! 
    Visually, the film is the final masterwork of costume designer Eiko Ishioka, passed way from pancreatic cancer in January at the age of 73. 


    The costumes for “Mirror Mirror,” nevertheless, include more than a few knowing winks, including a wedding dress of blue with an enormous orange bow that pays tribute to the Snow White of Walt Disney. Perhaps the most visually exciting example of Ms. Ishioka’s work is in a grand ball scene in which the guests are dressed in gowns inspired by animals — a swan, a walrus, a giraffe — all in shades of winter white, while the queen, played by Ms. Roberts, wears a venomous shade of red.
     queen’s character is a person who only cares about power,he said.  The designer turned the queen into a peacock, literally a red peacock. to show how whimsical and driven with power she was.
  • Snow White and the HuntsmanColleen Atwood
    SNOW WHITE (KRISTEN  STEWART)The designer took a practical approach to Snow White’s understated ensemble, which Stewart wears for most of the movie, by determining how a young woman locked away in a tower for seven years realistically might be dressed. “Snow White is a totally different kind of character. She's much less princess-y and more of a bad-ass girl. Her costume is leather with clamps and different stitching on it, so it’s quite different. f
    Atwood did hold onto one aspect of Snow White’s signature friill. As for rejecting the princess’s primary colors, the the olive and light blue just suited Kristen’s eyes and hair. The colors also looked good in the forest and against many different backgrounds, which was important, because she is in it for so long.”EVIL QUEEN (CHARLIZE THERON)
     In addition to modernizing Snow White, Atwood, who is known for detailed, handcrafted costumes, created a dozen elaborate looks for Charlize Theron’s evil Queen Ravenna. or the queen’s climactic showdown with Snow White, she outfitted Theron in a chainmail gown with leather spike details The fairest design of them all, however, might be Charlize Theron’s wedding gown, worn during Ravenna’s royal union to Snow White’s father, the ill-fated king. the severely corseted dress.  It was our way of telegraphing [the queen’s] evil edge. All of the fine embroidered details are actually leather.
    You can read Anna Karenina and Les Miserables through the below linkhttp://www.free-ebooks.net/ebook/Anna-Kareninahttp://www.free-ebooks.net/ebook/Les-Miserables/pdf/viewREFRENCES:Seventeen Magazine.comVanity Fair.comVouge.comLA times.comNewyorktimes.comFree-e books.net